
Private: Create a Grid Sampling Mission Using SSURGO Soil Layer
Create a Grid Mission Using SSURGO Soil Type
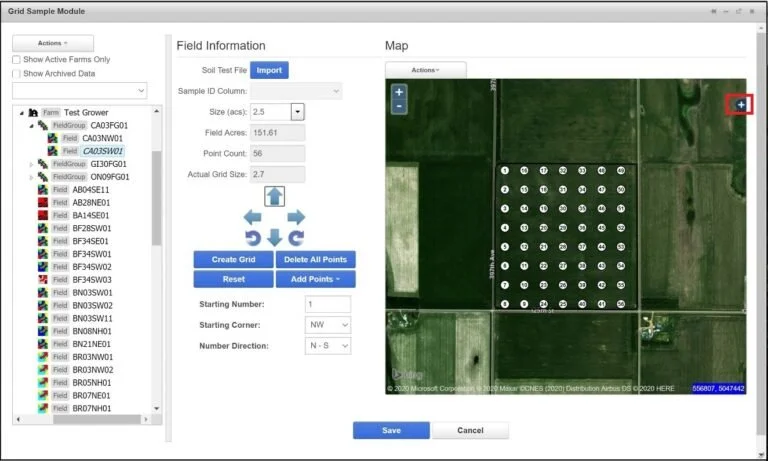
1. Select a field with an existing grid sampling mission.
Click the + sign on the top right corner of the map.
Check mark the SSURGO box.
You should now see the SSURGO Soil Layer behind the grid points. The soil type descriptions will appear below.
2. Edit the Sampling Mission.
The entire sampling mission can be moved and rotated using the arrows.
To move a single point, click Actions > Edit Points. Click and drag a point on the map.
Sampling points can be added. Add Points > Continue Numbering adds a sampling point continuing from the highest number. Add Points > Point in Between adds a point in between existing points and re-numbers the sequential points. Click on the map to add points.
To delete all points off the map, click Delete All Points.
To delete a single point, click Actions > Delete Feature Mode. Click on a point on the map to delete it.
To reset the sampling mission to its last saved state, click


3. When all changes have been made, click Save. The Select Season window opens. Assign a year to the sampling mission, and click The most current sampling mission will get dispatched when soil sampling is requested.
4. A message will appear when the points have been successfully saved.


